Set Up the Screen
After pairing, the Loft Interface provides two controller modes. The selected mode determines which devices are available on the screen. Select Home Controller or Room Controller, then select Continue.
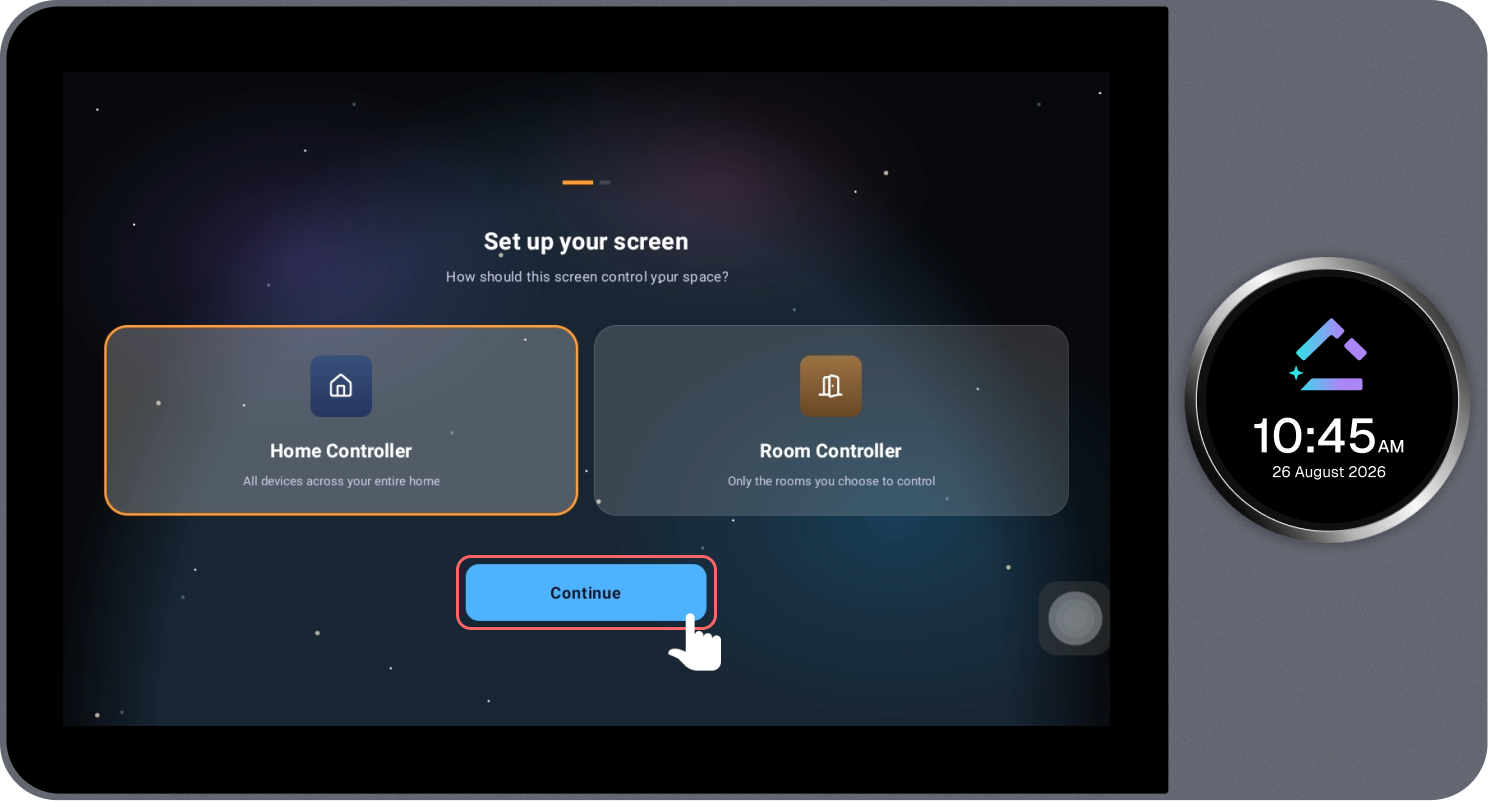
1. Home Controller
Home Controller mode provides centralized control of devices across the selected home. This mode is suitable for a main home control screen.
Select Home
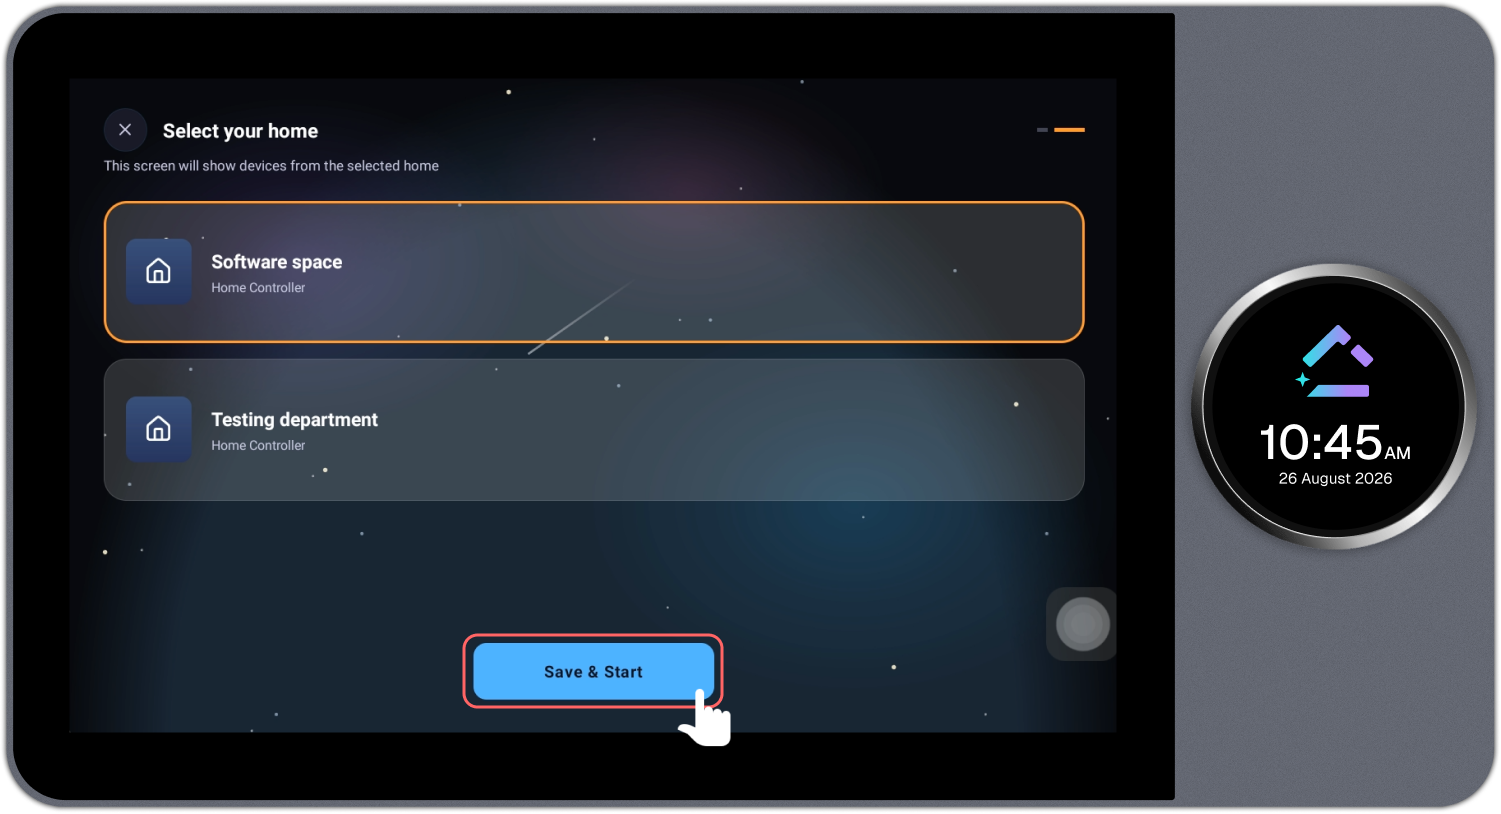
The Select Home page is used to assign a home to the Loft Interface. The available homes are shown in the list.
Steps
- Review the available homes.
- Select the required home. The selected home is highlighted with an orange border.
- Select Save & Start to confirm the home selection. The Loft Interface starts with the selected configuration.
This page is shown when Home Controller mode is selected. Only one home can be assigned to the screen at a time.
2. Room Controller
Room Controller mode limits the screen to selected rooms. Only devices associated with the selected rooms are shown for control.
Select Rooms
The Select Rooms page is used with Room Controller mode. One or more rooms can be selected for control.
Steps
- Review the available rooms.
- Select a room by selecting the checkbox or room card.
- Multiple rooms can be selected when required.
- Selected rooms are highlighted with an orange border and a selected checkbox.
- Select Save & Start to confirm the room selection. The Loft Interface starts with the selected configuration.
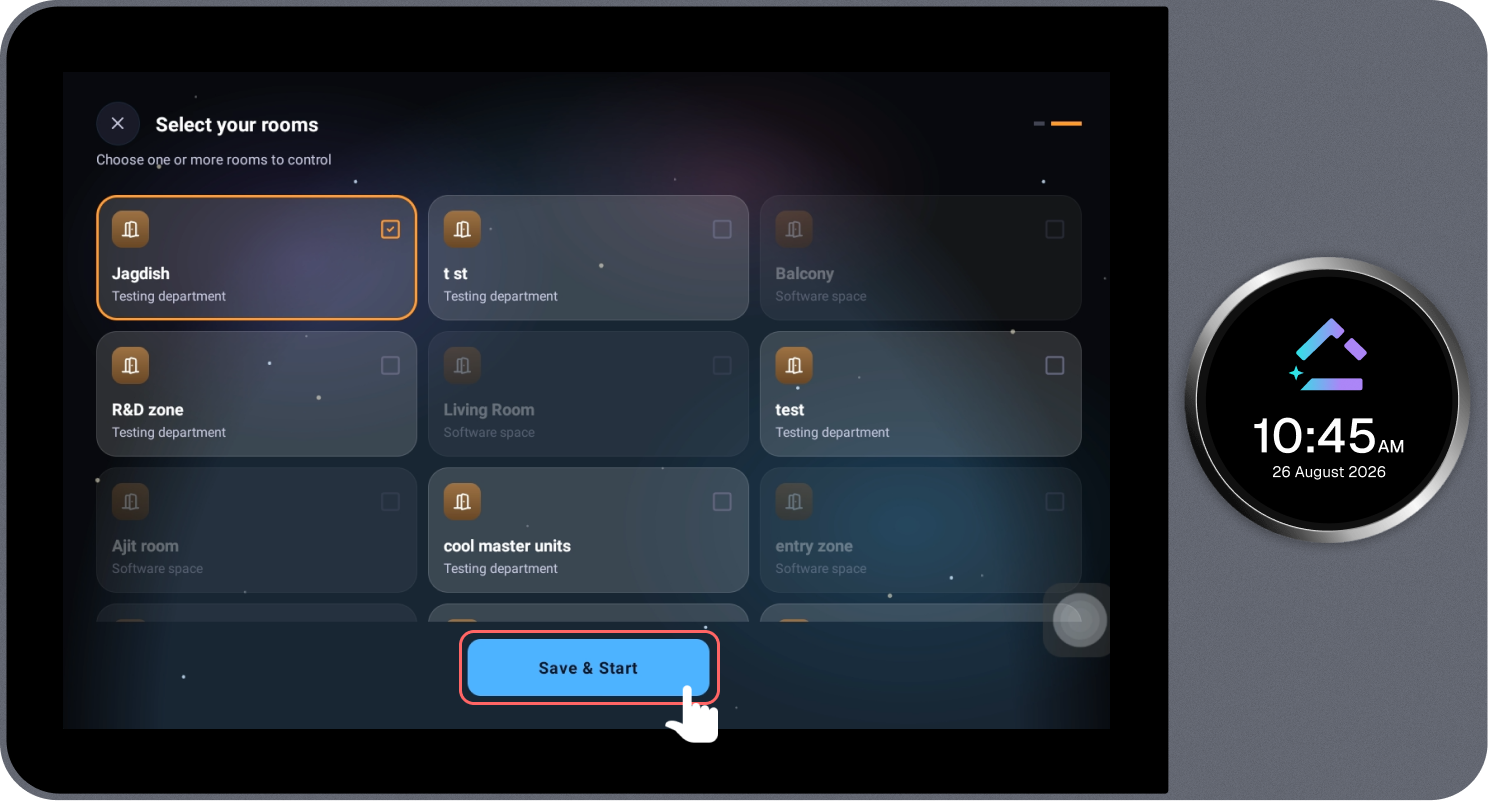
Rooms can only be selected from a single Home at a time. Rooms belonging to any other Home are automatically disabled and cannot be selected.
Next: Once setup is complete, the Home page is ready to be personalized with widgets. Continue to Customizable Home Page Widgets to get started.