Link with LMC
This guide provides a complete, step-by-step process to access the Loft Dashboard, where you can manage your devices and use advanced smart automation features.
Setup Requirements
To access the Loft Dashboard, ensure you have the following:
- LOFT App
- LMC
- Gateway
- Router
- PC or Display
Steps to Access Dashboard
1. Install and Set Up the LOFT App
- Ensure the LOFT app is installed and you have a registered account.
- If the LOFT app is not installed yet, Click here to learn how to download and set it up.
2. Login or Create an Account
- Open the LOFT app.
- On the Login screen:
- If you already have an account: Enter your email and password, then tap Login.
- If you don't have an account: Tap Sign Up, enter email, password, confirm password, then tap Sign Up.
Click here to learn more about creating an account in the LOFT app.
Once successfully logged in, continue with the next steps.
3. Install and Set Up Your Devices
- After logging in to the app, make sure to properly install all the devices you need. Click here to learn more about how to install a device.
- Once your devices are installed, set up / provision all the installed devices. See the Setup Device guides for step-by-step instructions for each device type.
4. Set Up LMC and System Architecture
To access the dashboard, your LMC and Gateway must be configured correctly.
- Make sure your LMC is properly set up (Ethernet cable, power cable, IP configuration, etc.).
- Ensure your Gateway is configured and added to zones. This is required to operate devices in Cloud Mode.
- Check your router connection with the LMC and confirm network setup.
5. Get Your IP Address
Before opening the dashboard, you need to know the Assigned IP Address of your LMC.
- Log in to your router's admin portal (usually accessible via an address such as
192.168.1.1or192.168.0.1, printed on the router itself). - Navigate to the connected devices / DHCP client list section.
- Locate your LMC in the list and note down its assigned IP address.
Tip: You can also use a tool like Advanced IP Scanner to scan your local network and quickly identify your LMC's assigned IP address, without needing to log in to the router portal.
6. Accessing the Dashboard
Once you know your Assigned IP Address (Static or Dynamic):
- Open any web browser on your PC or display device.
- Enter the LMC IP Address into the browser's search bar.
- If the IP is correct, the Loft Dashboard Login Screen will appear.
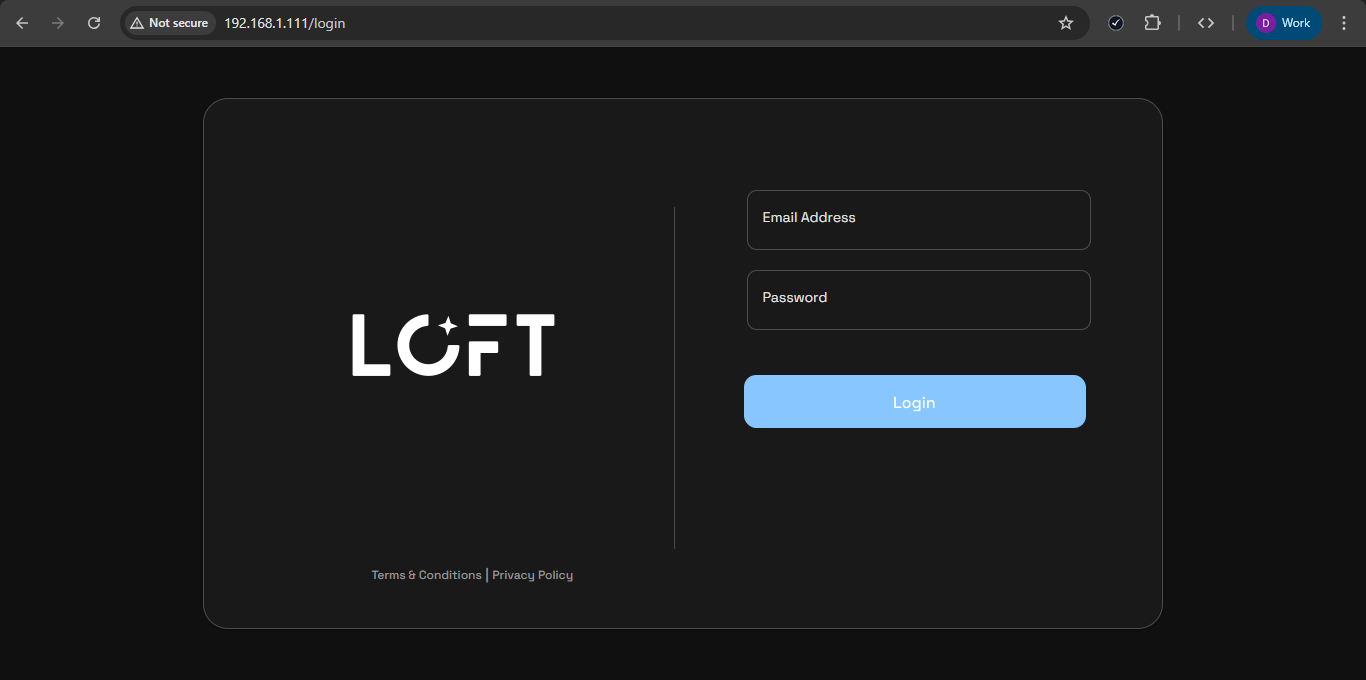
7. Login to Dashboard
- Enter the same account login credentials you used in the LOFT app (email + password), then click Login.
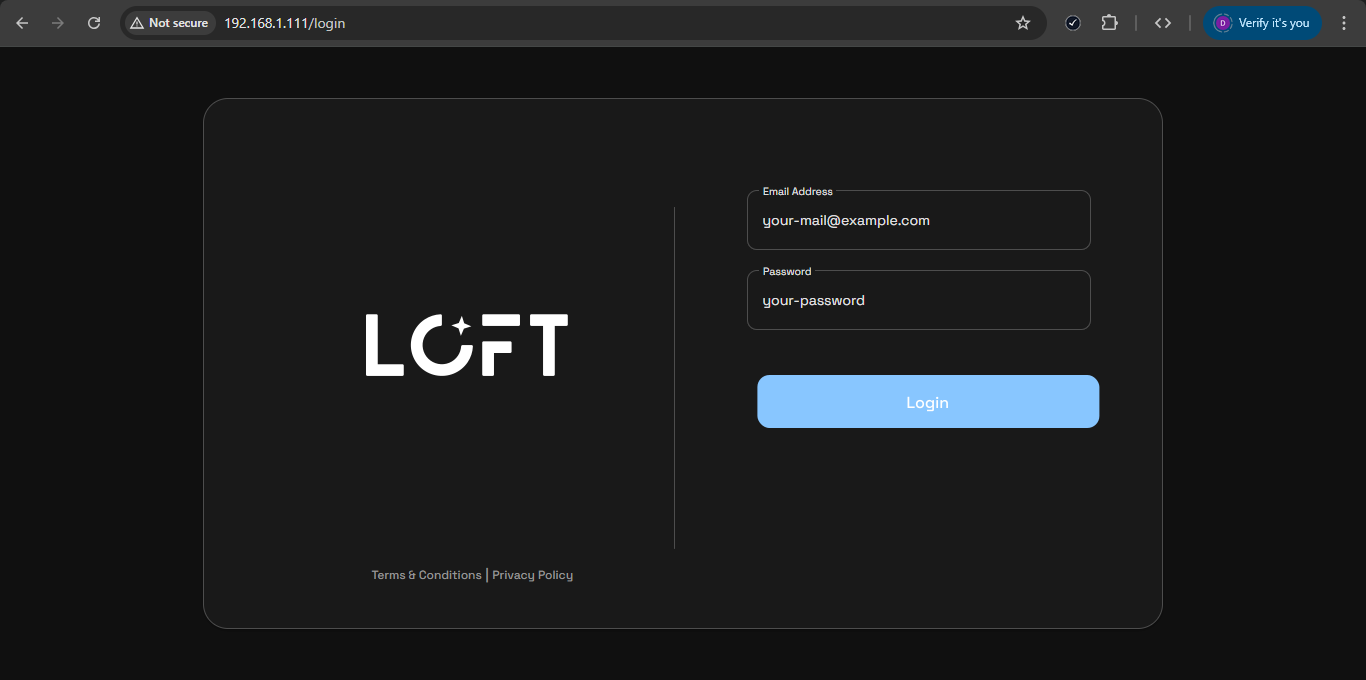
- Once the credentials are verified, a QR Code screen will appear.
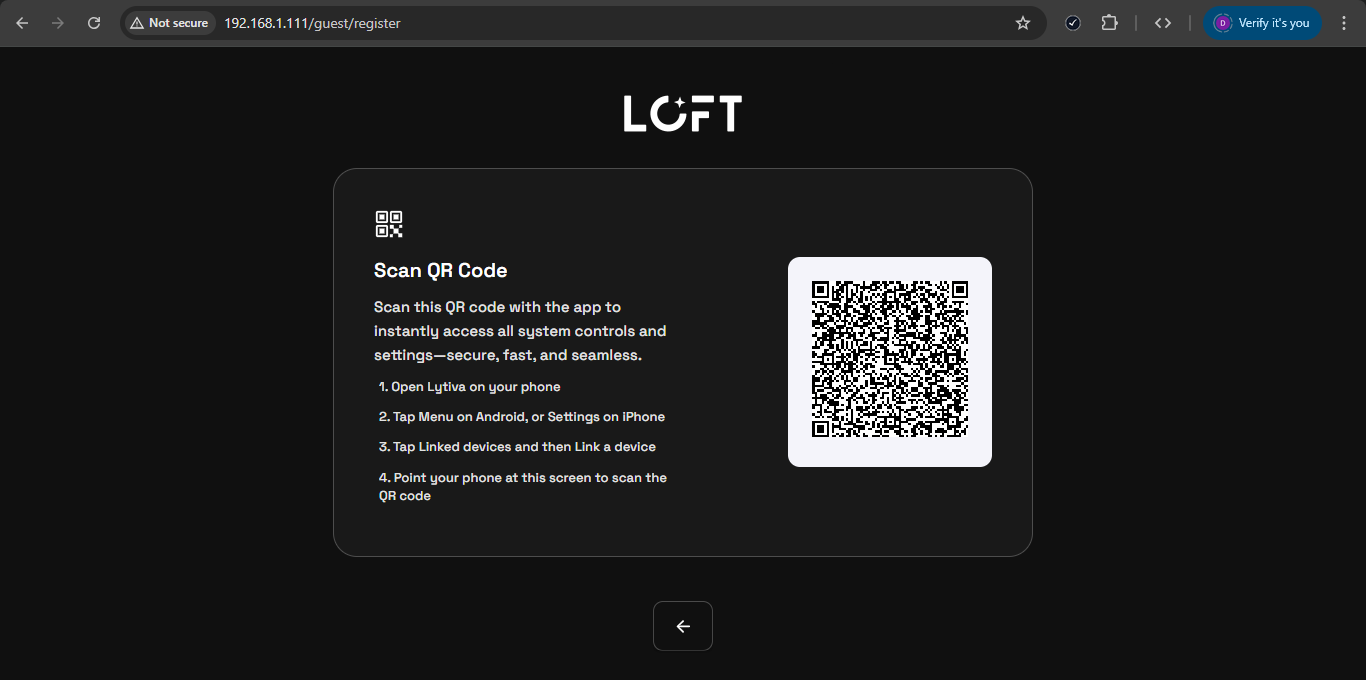
8. Link Your Account by Scanning QR Code
Follow these steps to link your LOFT app with the Dashboard:
- Open the LOFT app on your phone.
- Tap the hamburger icon at top left corner.
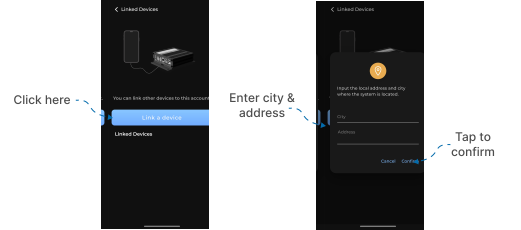
- Select Linked Device.
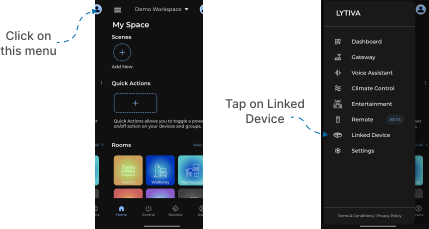
-
Tap Link a Device button.
-
A popup will appear — fill in:
- City Name
- Address
Then tap Confirm.
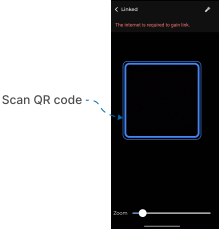
- The QR Scanner will open.
- Point your phone camera toward the QR code displayed on the Dashboard.
- Ensure your internet is ON during the scanning process.
Once scanned successfully:
- Return to the Dashboard screen.
- Go back or navigate to the Login screen again.
- Re-enter your login credentials and click Login.
The Dashboard will now open, and your LOFT app account will be successfully linked.
9. Accessing Device Control & Automation
Once the Dashboard opens:
- You can access, manage, and operate all your devices.
- You can use advanced smart control, automation, and system insights available on the Dashboard.